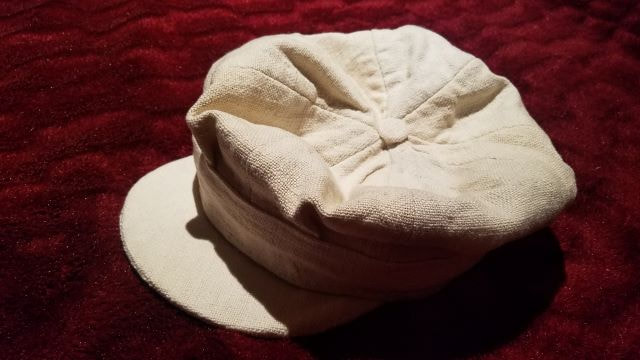
 I can't tell you how excited I am about this. I made a hat! I proper hat! And not just a knitted bobble hat either, but a several-panelled, properly sewn hat! (Not that I'm knocking bobble hats, but they are more within my range of normal skills - although come to think of it, I'm not sure I've ever made one...) Anyway. Peter often wears a hat like this, and as he has a rather large head, and is extremely particular about his hat preferences, they are usually sourced from a firm in Poland. Sadly, when the time came to replace the most recent hat, the Polish firm had none available. We waited several months with him still wearing the battered old hat, but eventually we had to admit defeat, and since our searching for a new supplier was not proving fruitful, I offered to make one. How hard could it be?? 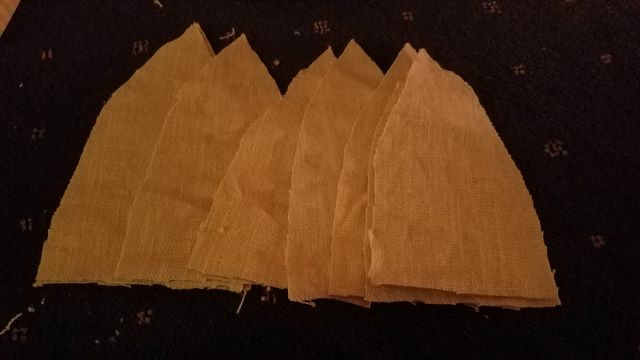 I found several patterns online, but they all seemed to involve things like measuring, and as I lean towards the slapdash when it comes to sewing projects, I opted to just vaguely draw round the old hat (without taking it apart, just in case) and hope for the best. Peter found an old blind that had a water stain in one corner and I set to with the scissors. At first, things went reasonably well. I didn't have a grand plan, I just added a bit at a time to see what would happen, accepting that I'd probably have to do quite a bit of unpicking. First I cut out the eight panels, and sewed them together in a circle, and then cut and sewed on a band. 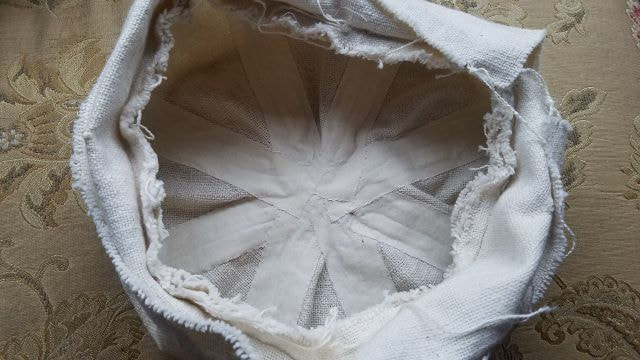 This fabric frays really easily, so I ended up having to buy some iron on mending tape to sew over the seams. Obviously I had to press them first - and of course the lessen here is that I should have pressed the seams and ironed on the bending tape before sewing on the band, because things got really rather awkward. Still, it was manageable, and I hand sewed over the edges of the iron on tape as I wasn't sure the stickiness would hold up to the abuse of being worn every day.  Look, it's started to look like a hat! Just needs a brim. 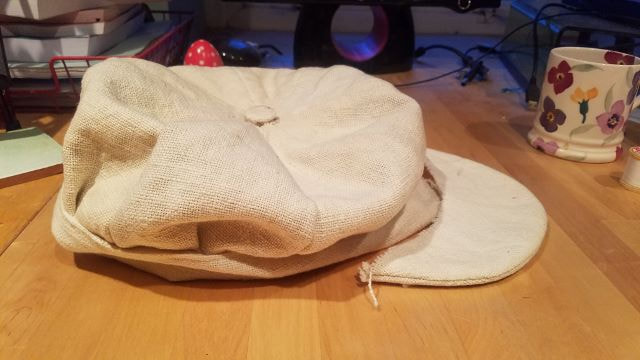 Actually, first it needs something solid inside that band, and for this attempt I did butcher an old hat (not the most recent, but a similar style). 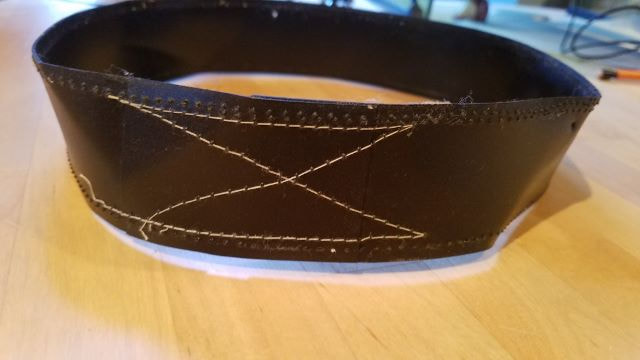 This had clearly been sewn into the old hat using an industrial sewing machine, and while my sewing machine is pretty heavy duty (apparently it will sew through eight layers of denim - not sure why), by this point the hat was getting a bit awkward to manipulate through the machine, and I was doing everything by hand instead. The little holes were very small, so I spent a rather grumpy hour poking a needle through to make them slightly bigger before I put the whole thing inside the fabric. 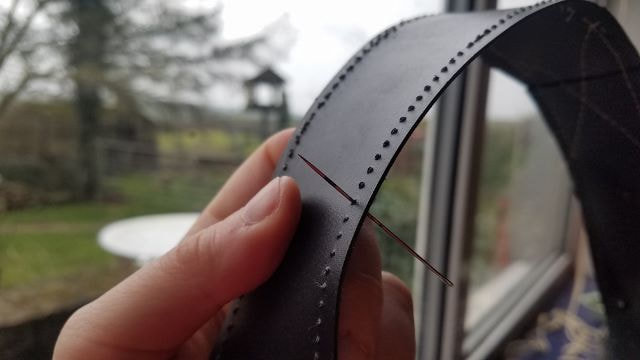 Easily the most tedious bit of hat making by far, and I wouldn't do this if I was making a hat from scratch. However since the holes were there, it seemed daft to try and make new holes through the fabric. The whole thing was quite awkward though, and of course once I was sewing through the fabric, I couldn't see the holes so had to feel for them with the end of the needle. Yawn. 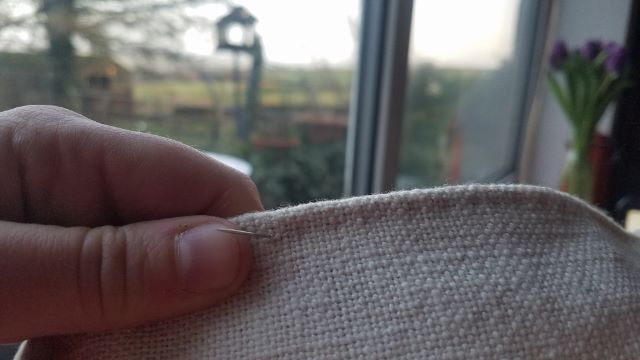 Far more cheerful was making the little button for the top. Just a circle of plastic I found lying around (I'm hoping it wasn't from something important...) and covered with a bit of the gathered fabric, then sewed onto the top to cover the hole where the eight panels were joined. Very jolly. 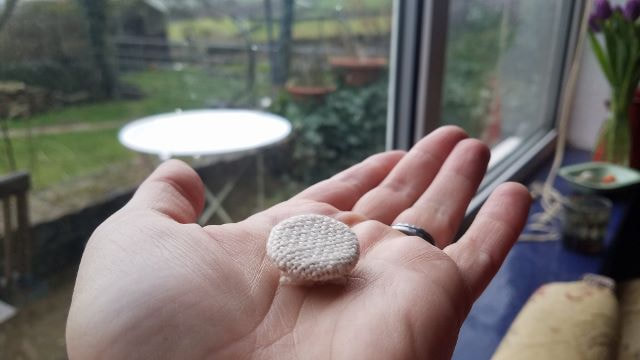 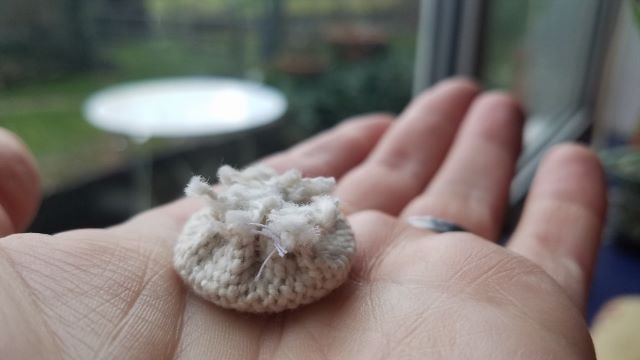 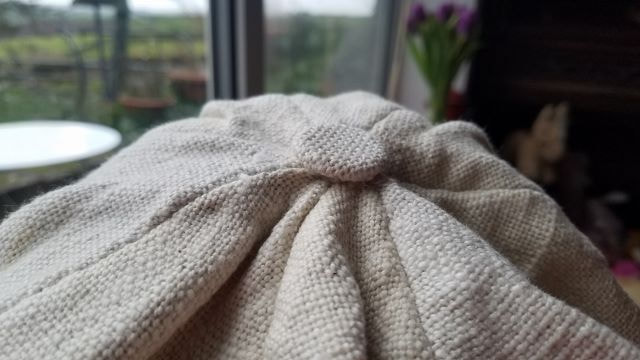 Finally the brim, and another nuisance that I don't even seem to have taken any pictures of. I drew round the one on the old hat (sadly the brim from the ancient hat that I butchered for the hat band had already disappeared), and cut out a piece of orange plastic folder. This fabric is quite thick, and quite loosely woven, so getting a tight fit and a tight seam was a complete nuisance. I even glued a bit of iron on mending tape to the plastic, then ironed the fabric onto that, but it still isn't quite right and moves around more than it should. Still, finally it was done, and I'm delighted to say it does actually fit! I'm less delighted that the combination of the thicker fabric and the pleats I put in (because I hadn't properly measured the 8 panels, and cut a bit too much seam allowance which I didn't use) made the whole thing stand up rather than the old one, but I'm hoping that will settle with use (or rain). 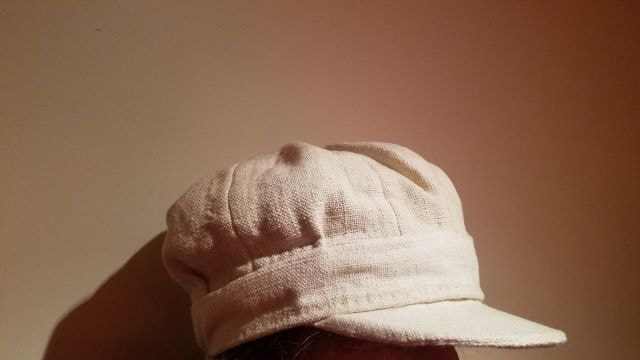 Altogether pretty good I reckon for a first attempt, and I've learned an awful lot about hat making (hattery??) in the process. Next time I'd use thinner fabric, iron and cover the seams of the panels before adding the band, and perhaps even use a narrower band. I think I'd also make more use of iron on tape - I think the band would look better if the fabric were stuck more closely to it (maybe thinner fabric would help there too).
Anyway, I'm still too close to it and can see all the flaws, but the fact remains that I made a hat, and except for about 3 metres of iron on tape, it's made entirely of reused materials. Not bad at all.
4 Comments
TDQKaren
23/2/2020 01:41:34 pm
Had to use good old Google but what you are doing is millinery. I think very successfully too, it looks great
Chris
27/2/2020 01:02:24 pm
Well done you. Looks great!!! I can never find the kind of hat I like- wish I had your skills Leave a Reply. |
Hello!Sit down and make yourself comfortable. I'm Jenni, and I write here about our new foray into country living, which includes growing food, knitting, baking, wandering around the fields, and seeing which local cafe serves the best cake. Categories
All
Archives
February 2024
|
 RSS Feed
